

LobeChat
This documentation is provided for informational purposes only and demonstrates how to configure and use our API with third-party AI chat interfaces. Any third-party software, websites, or services mentioned are not operated, controlled, or endorsed by us.
Introduction to LobeChat
Section titled “Introduction to LobeChat”
LobeChat is an open-source, multi-modal AI chat platform and framework that serves as a unified interface for various large language models (LLMs). Designed as a personal AI “operating system,” it enables users to access, orchestrate, and interact with different AI models and tools through a single, cohesive interface.
Key features include:
- Multi-provider model support via OpenRouter protocol
- Plugin ecosystem for extended functionality
- Customizable conversation management
- Cross-platform accessibility
Access LobeChat
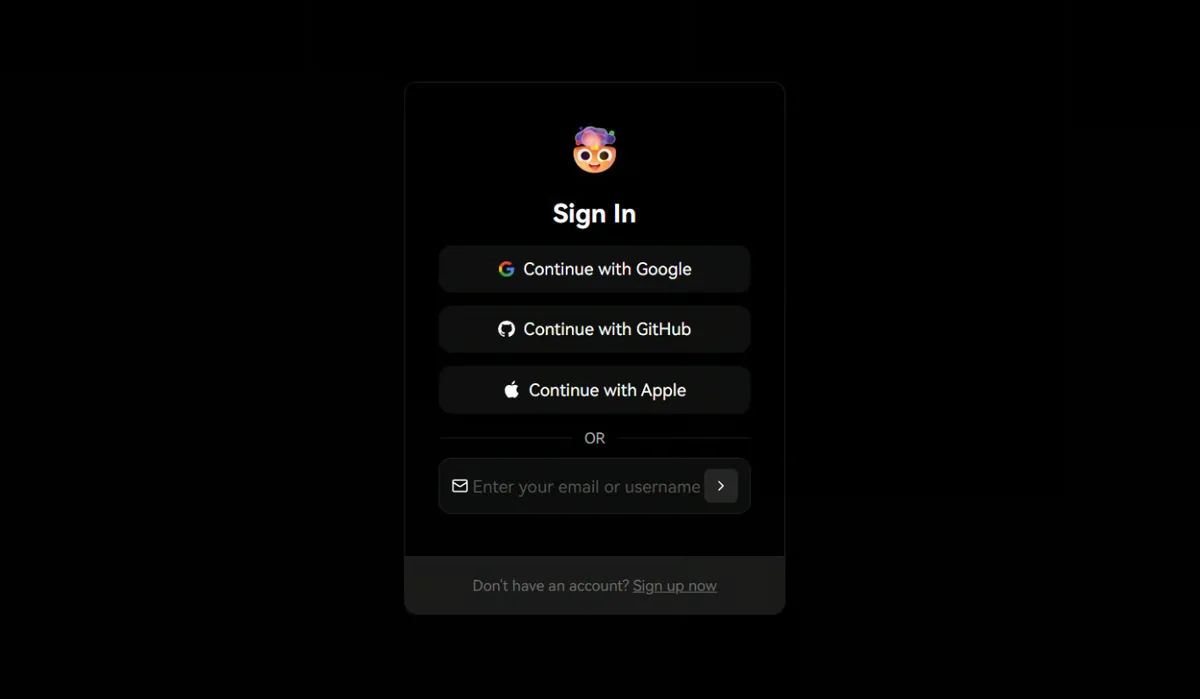
Navigate to https://lobechat.com and authenticate using your preferred sign-in method (e.g., GitHub, Google, or email). Configure some account settings according to your own preferences.
Navigate to AI Service Provider Settings
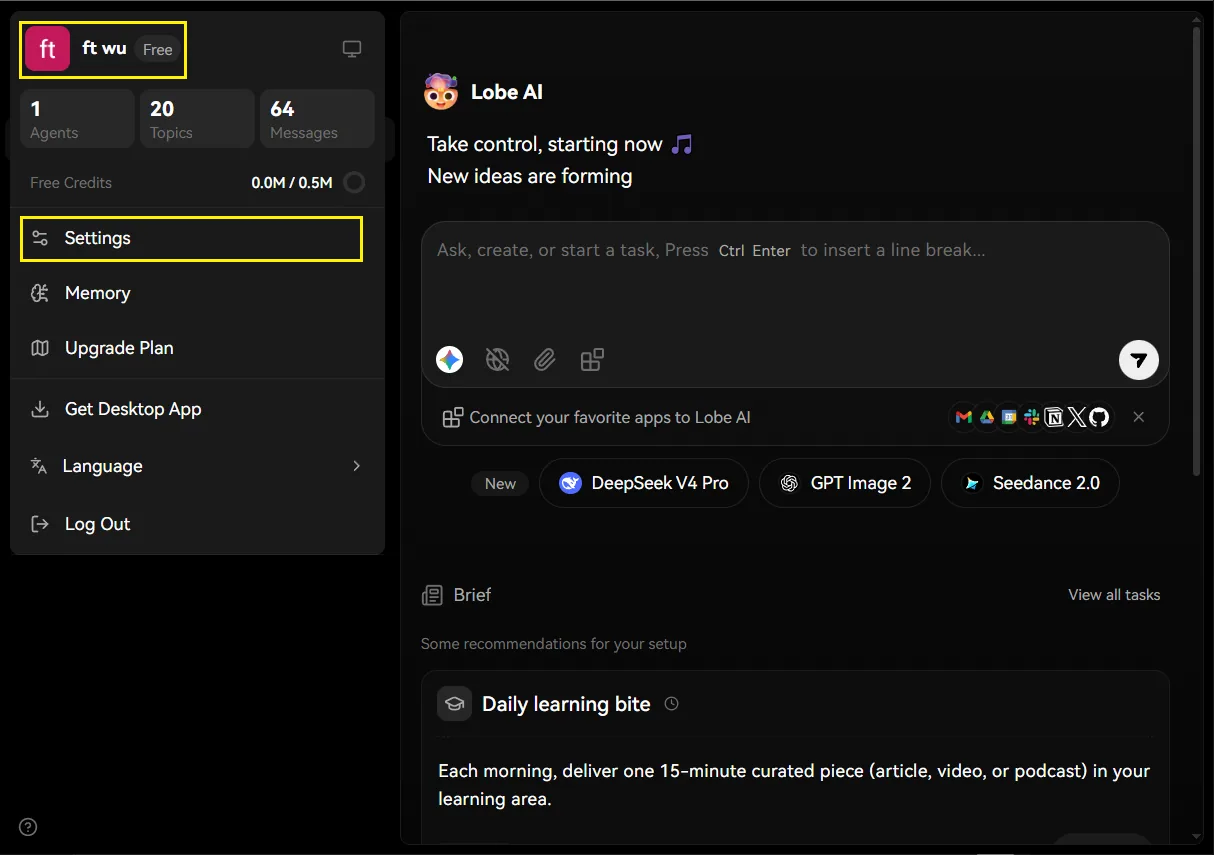
- Locate and click your user avatar in the top-left corner of the interface.
- Select “Settings” from the dropdown menu.
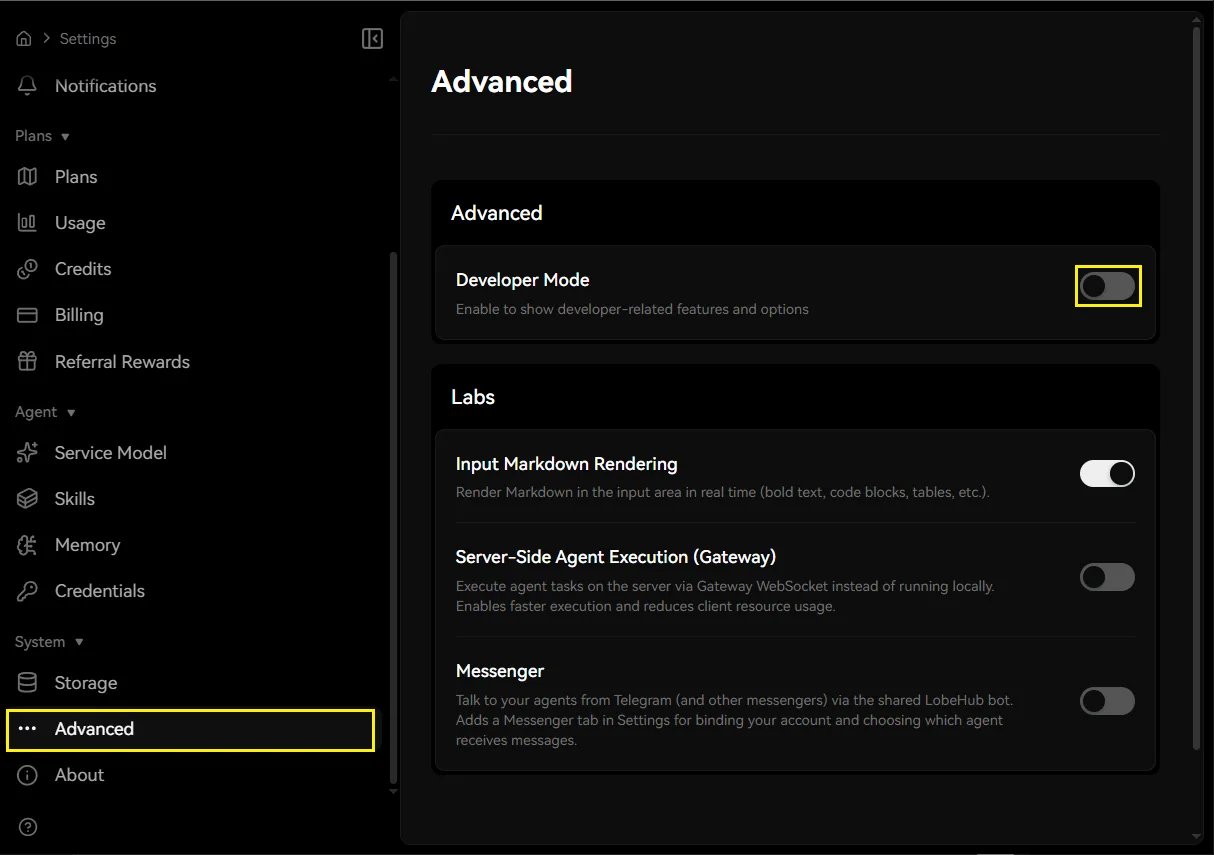
- In the Settings panel, navigate to “Advanced” in the bottom-left sidebar.
- Enable Developer Mode.
Configure RouterLink API Connection
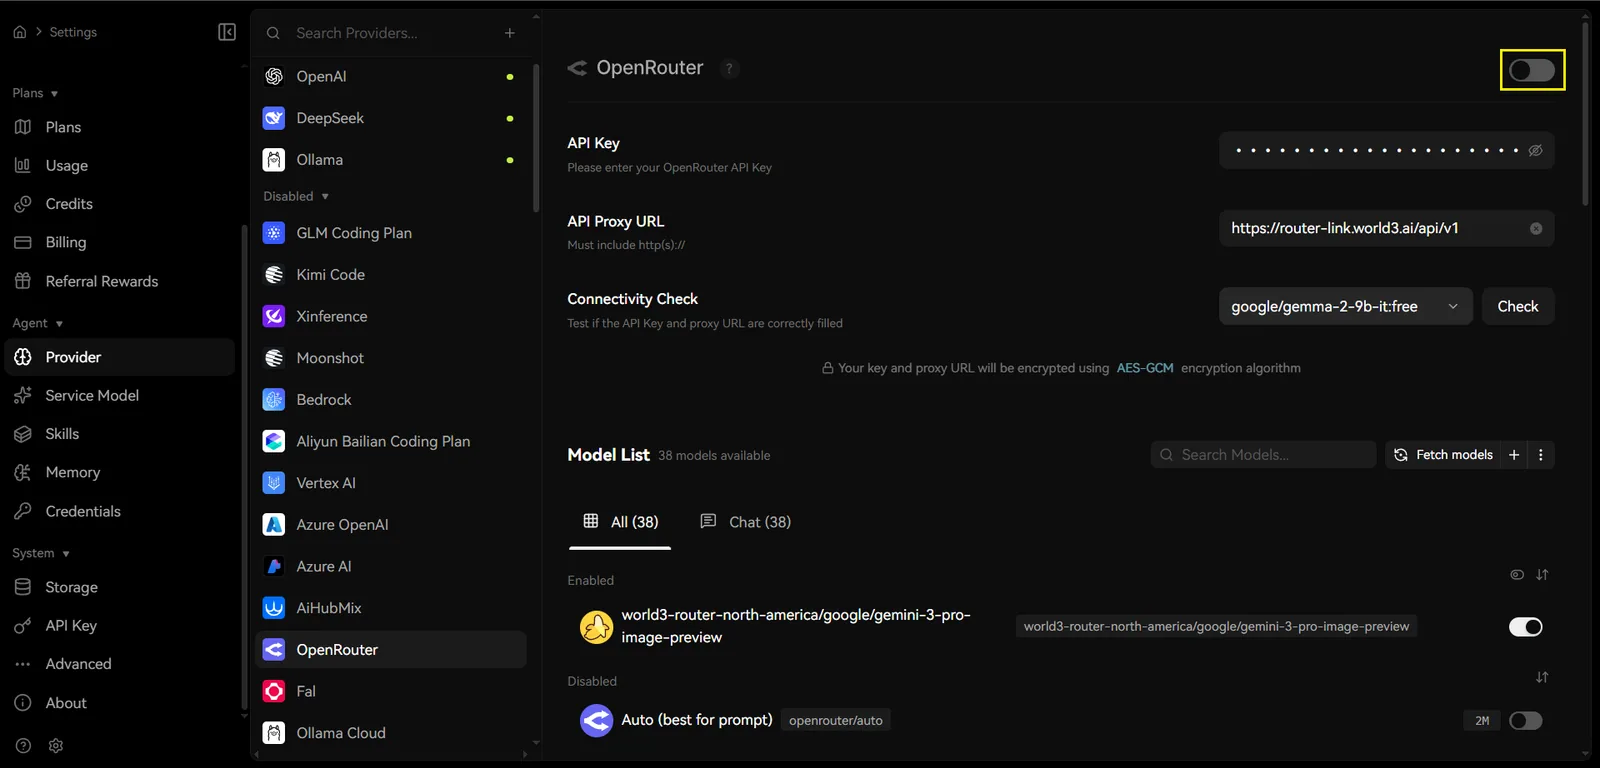
Click Provider → OpenRouter, then configure the API Key and API Proxy URL:
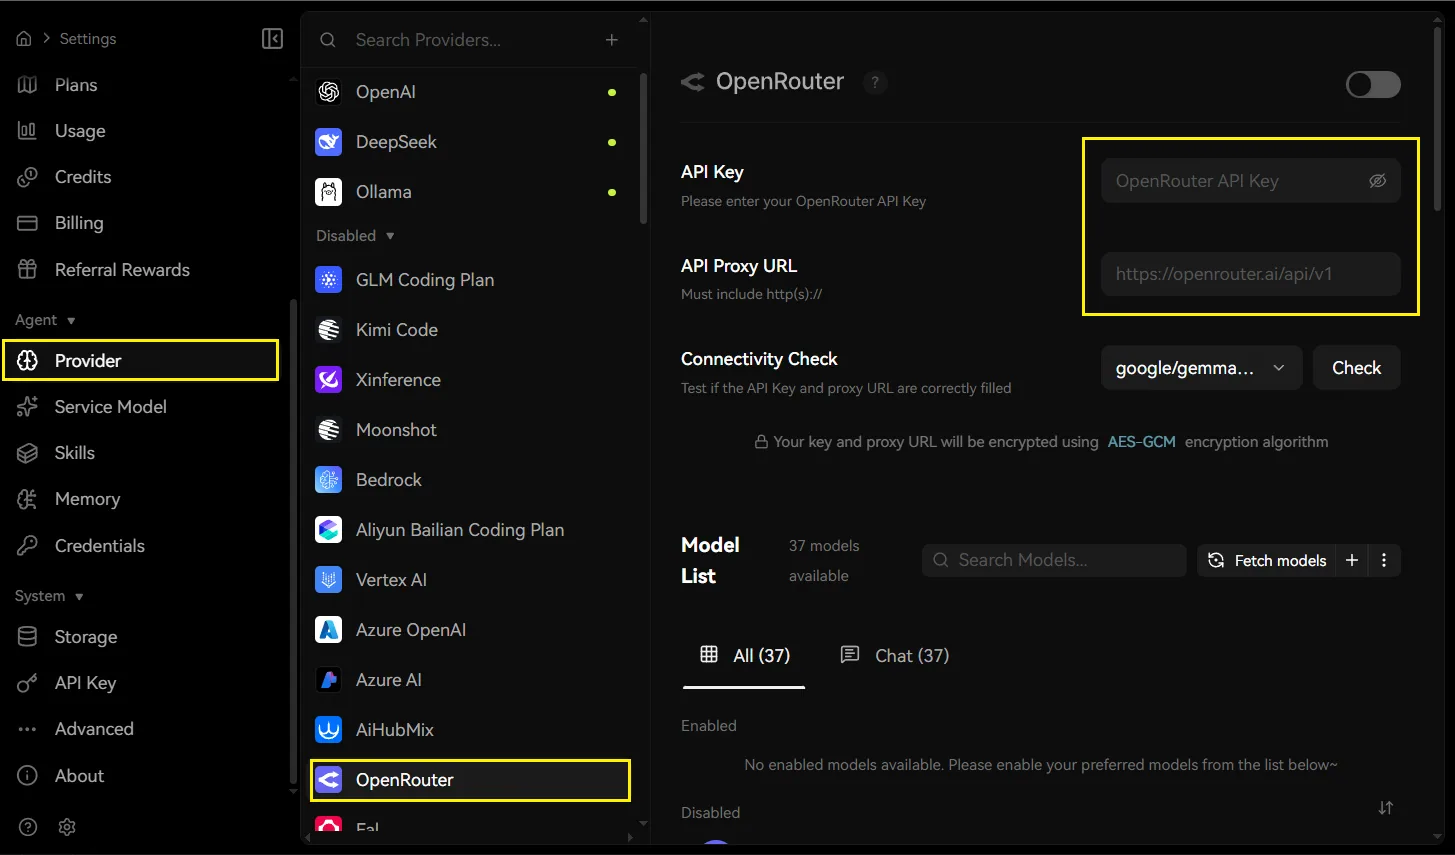
API Configuration Parameters
| Field | Content |
|---|---|
| API Key | Obtain one from RouterLInk |
| API Proxy URL | https://router-link.world3.ai/api/v1 |
After entering the credentials, click the “+” button adjacent to add a custom model configuration.
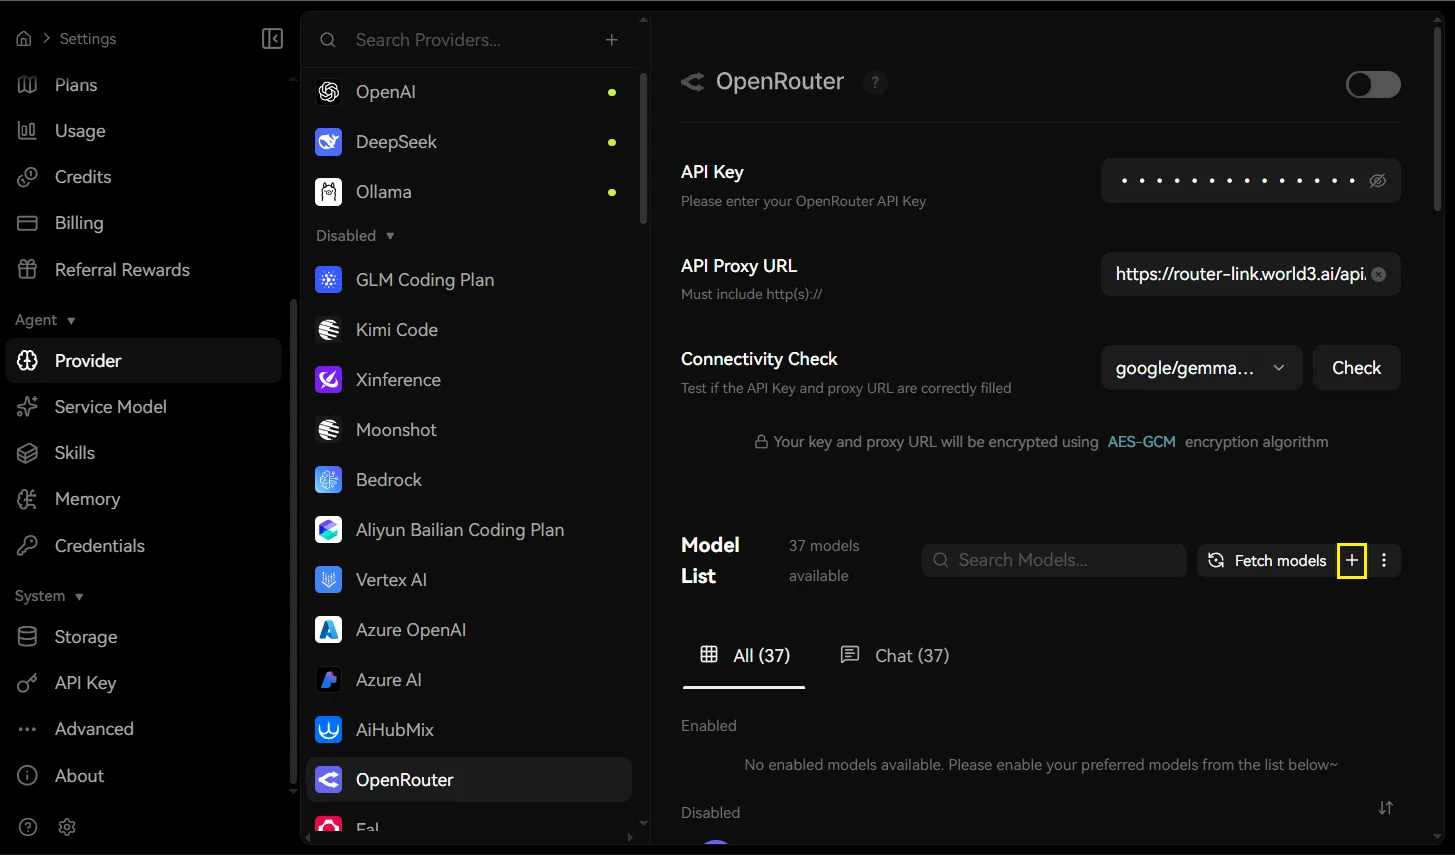
Model Registration
Section titled “Model Registration”Specify the model you wish to utilize. This example demonstrates configuration for Gemini 3 Pro Image Preview.
For optimal compatibility, please select API format: OpenAI.
Provider: world3-router-north-america
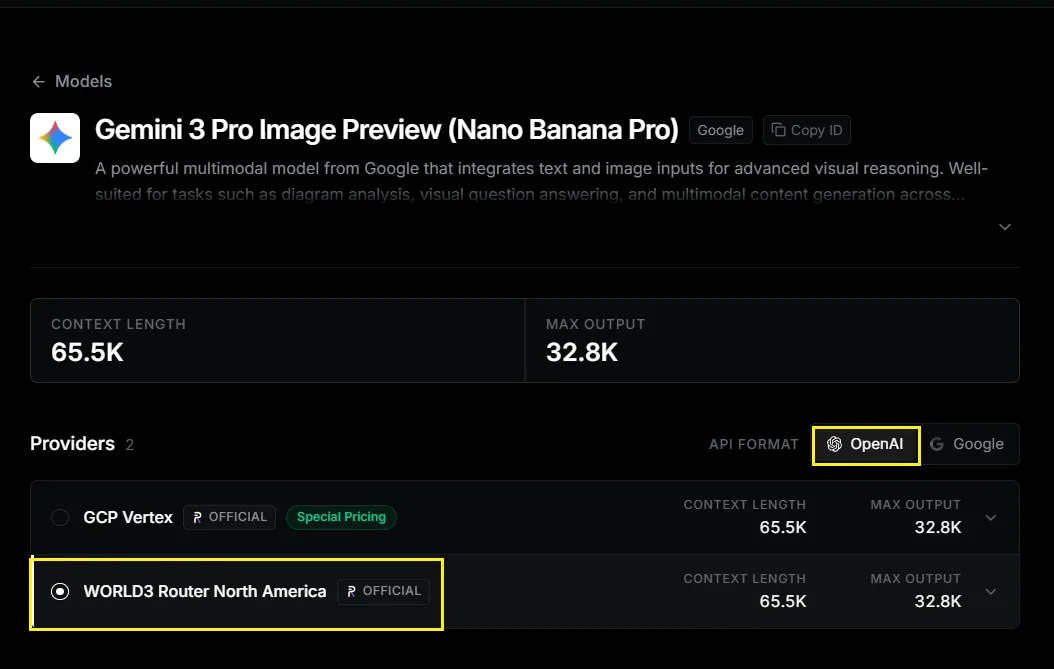
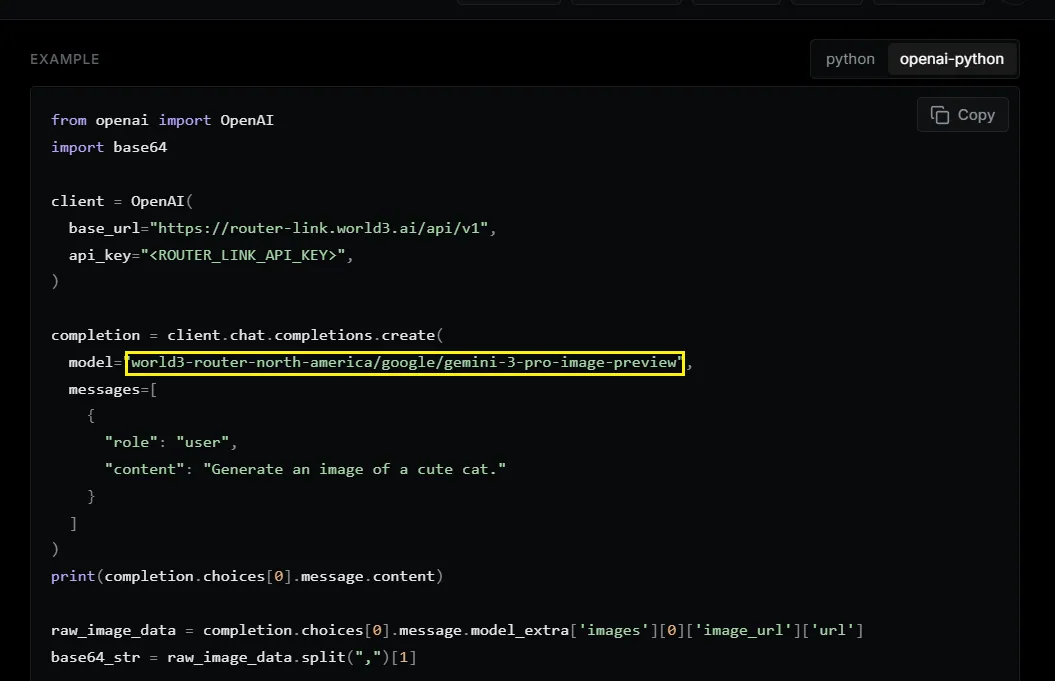
Model ID Format:
Enter the fully-qualified model ID:
world3-router-north-america/google/gemini-3-pro-image-preview
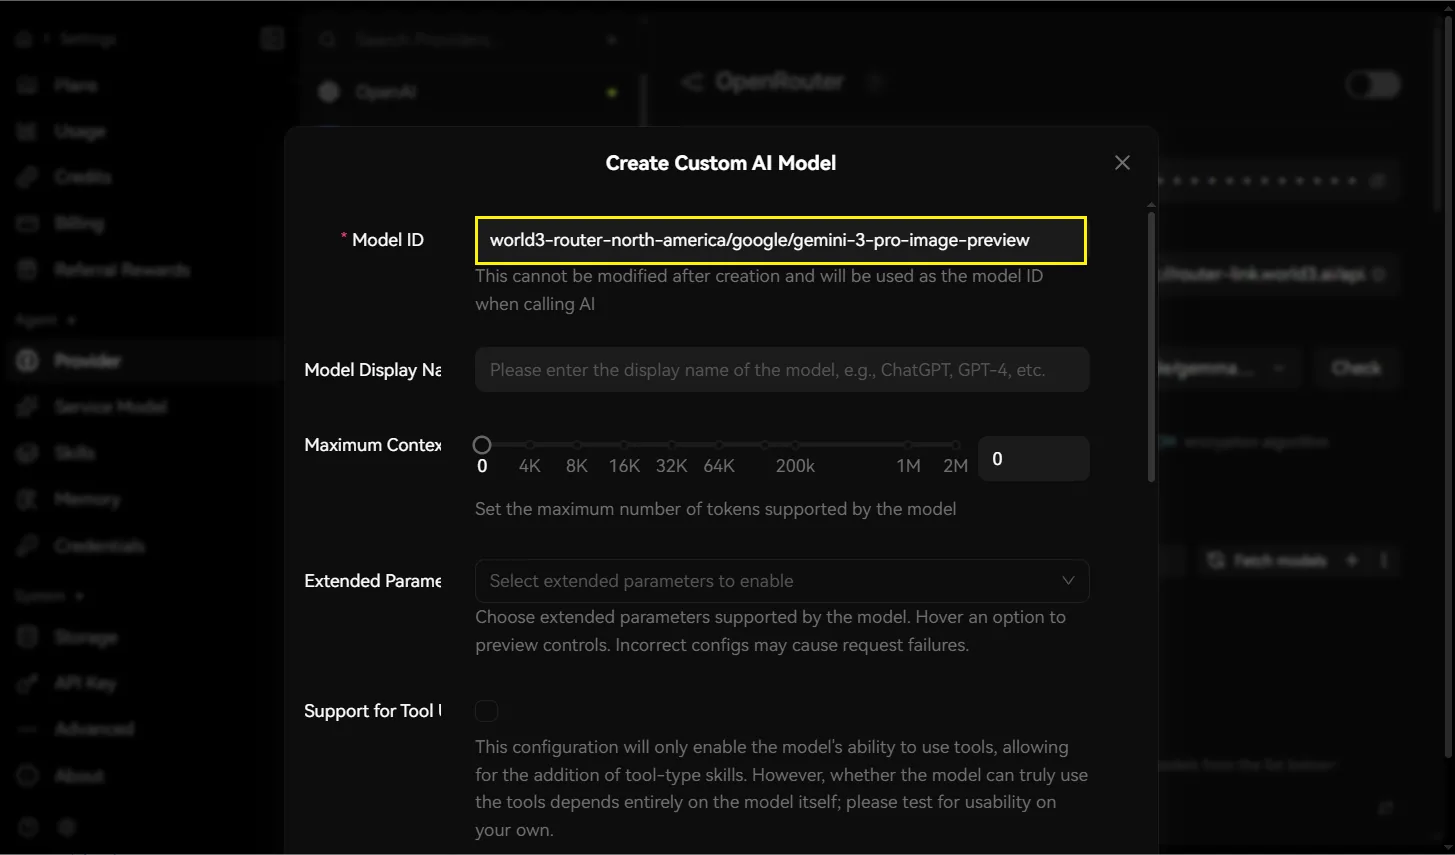
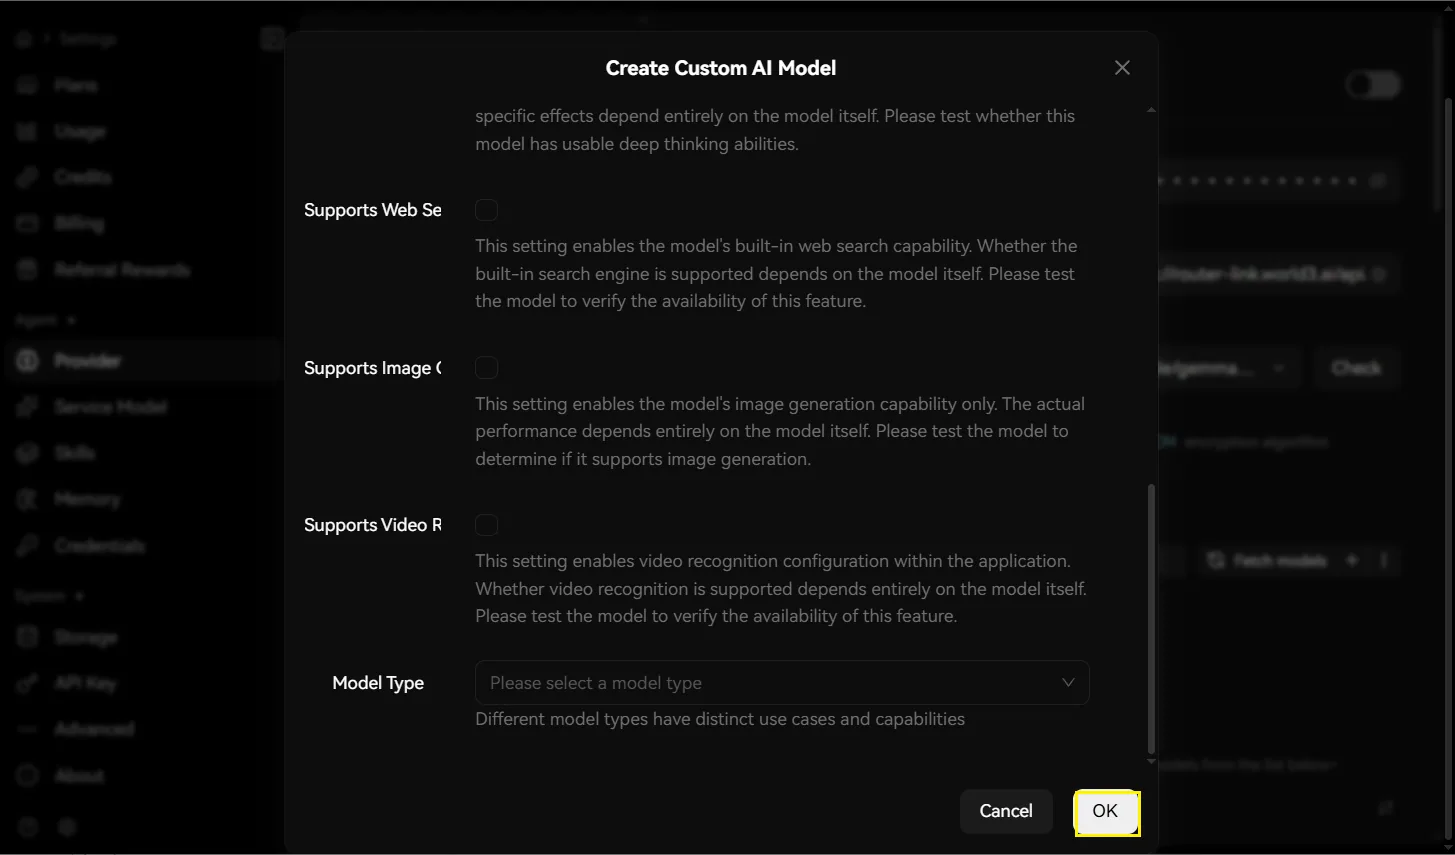
You can configure some settings here, then click “OK” at the end.
Enable the Provider
Section titled “Enable the Provider”Toggle the OpenRouter master switch in the top-right corner to enable the provider connection.
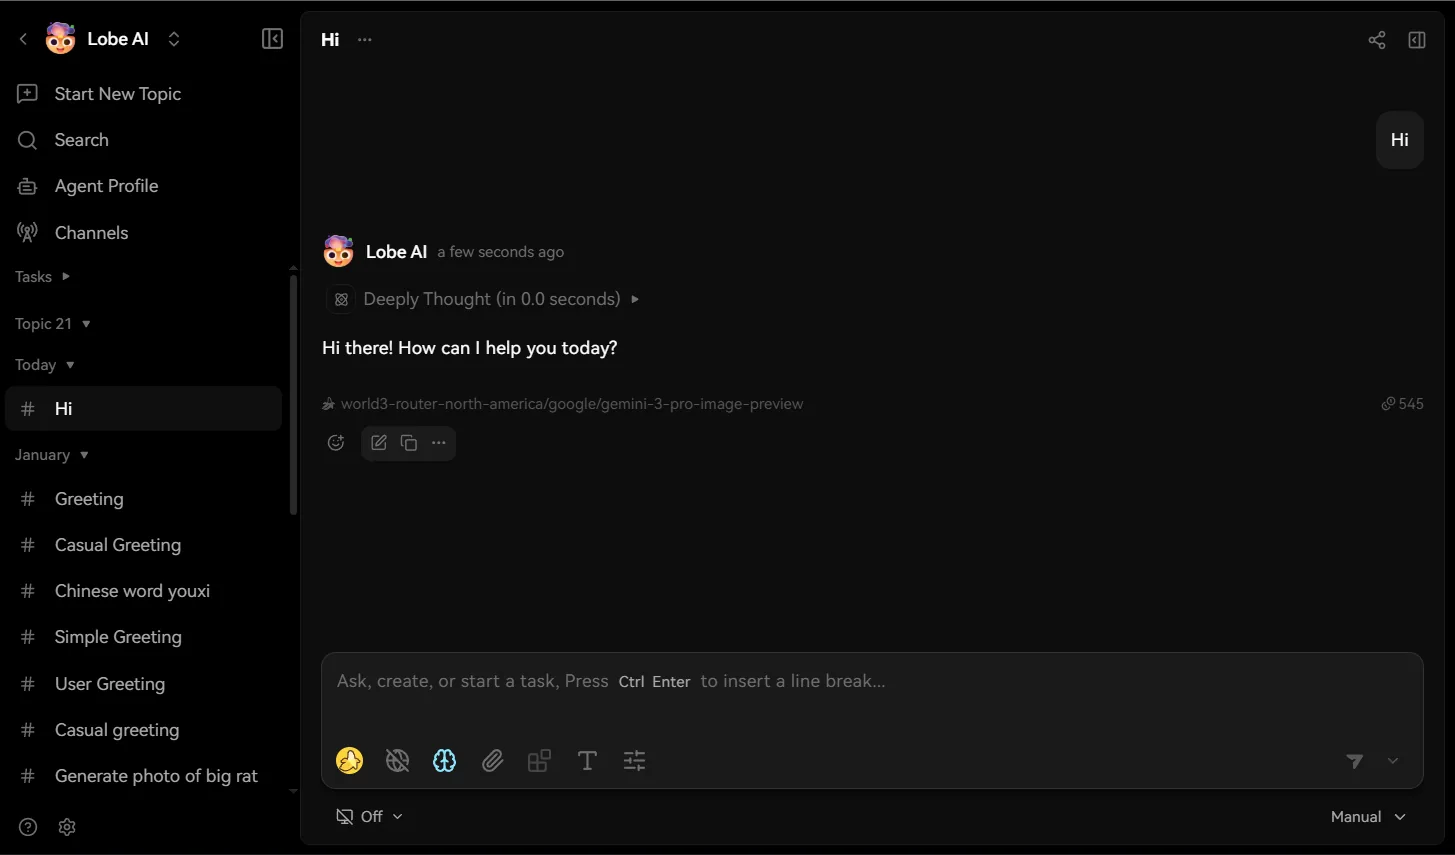
Initiate a Conversation
- Click the Home button on the left sidebar and select a model under OpenRouter.
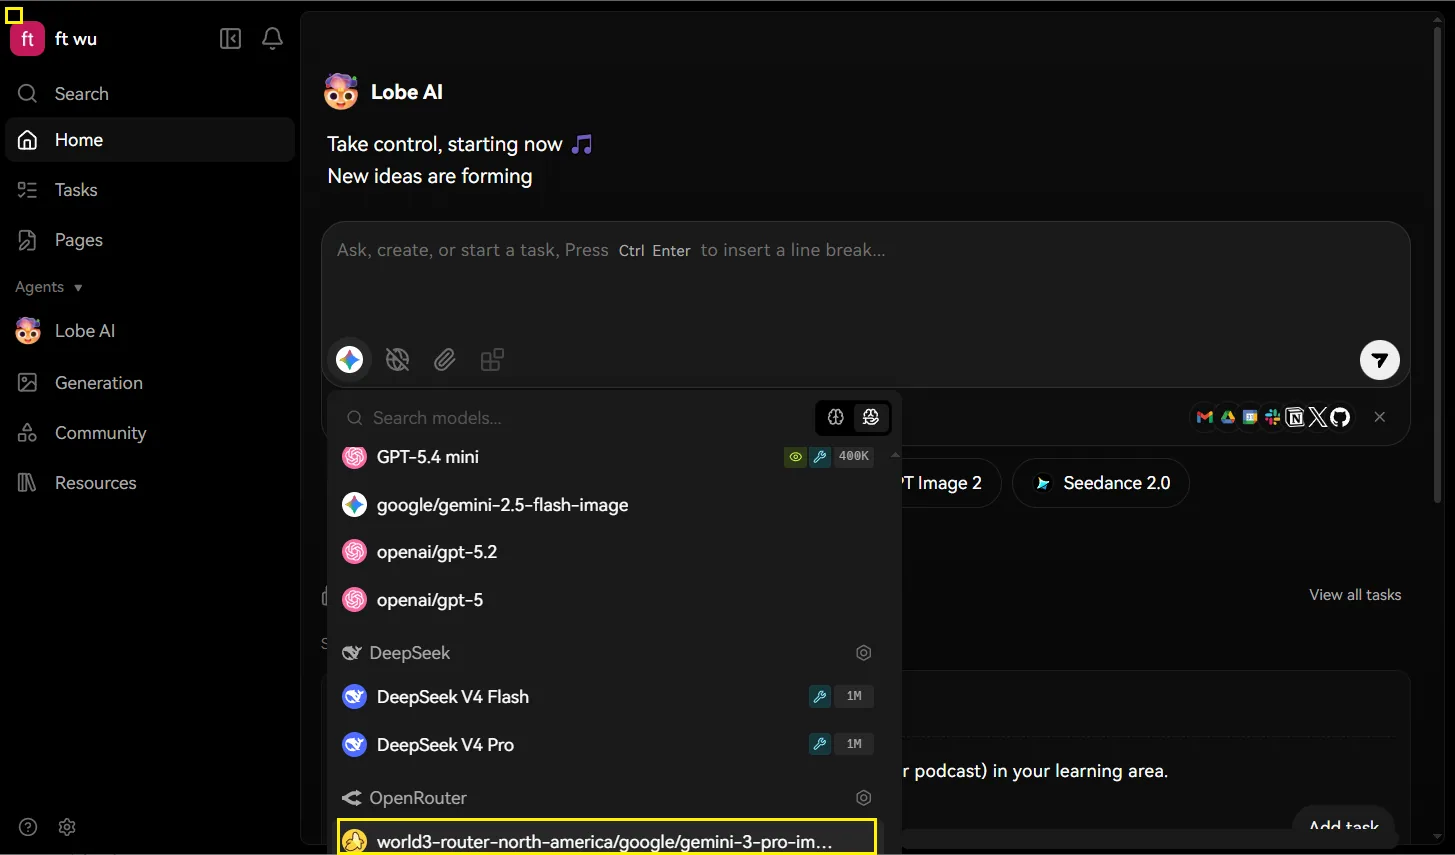
- You can start using it now.
Troubleshooting
Section titled “Troubleshooting”| Issue | Solution |
|---|---|
| Authentication failed | Verify your API key is correctly copied without leading/trailing spaces |
| Model not responding | Confirm the model ID matches the exact format from the RouterLink documentation |
| Connection timeout | Check your network connectivity and ensure the API Proxy URL is correct |