

OpenClaw
This documentation is provided for informational purposes only and demonstrates how to configure and use our API with third-party AI chat interfaces. Any third-party software, websites, or services mentioned are not operated, controlled, or endorsed by us.
Introduction to OpenClaw
Section titled “Introduction to OpenClaw”
OpenClaw is a personal AI assistant you run on your own devices. It answers you on the channels you already use (WhatsApp, Telegram, Slack, Discord, Google Chat, Signal, iMessage, BlueBubbles, IRC, Microsoft Teams, Matrix, Feishu, LINE, Mattermost, Nextcloud Talk, Nostr, Synology Chat, Tlon, Twitch, Zalo, Zalo Personal, WeChat, WebChat). It can speak and listen on macOS/iOS/Android, and can render a live Canvas you control. The Gateway is just the control plane — the product is the assistant.
OpenClaw Key Features:
- Autonomous AI agent that executes real tasks
- Self-hosted with full data control
- Multi-channel (Telegram, Slack, Web, etc.)
- Extensible skill/plugin system
- Supports multiple AI models
- Persistent memory across sessions
- Built for automation & workflows
Install OpenClaw
OpenClaw requires Node >= 22.14, please install the newest LTS version of Node.js.
After installation is complete, open the terminal (Windows users use PowerShell) and check the version number.
- macOS, Linux, Windows:
node -vIf it cannot be displayed correctly, please search for related issues and make sure that your current system version is not outdated.
Windows users may be unable to run scripts because of digital signature requirements. Please run the following command:
Windows PowerShell:Terminal window
Install OpenClaw.
npm install -g openclaw@latestConfigure OpenClaw
Windows users may encounter issues running the software due to missing VC runtime libraries. Please download and install this software.
Open the terminal and run the following command to begin configuration.
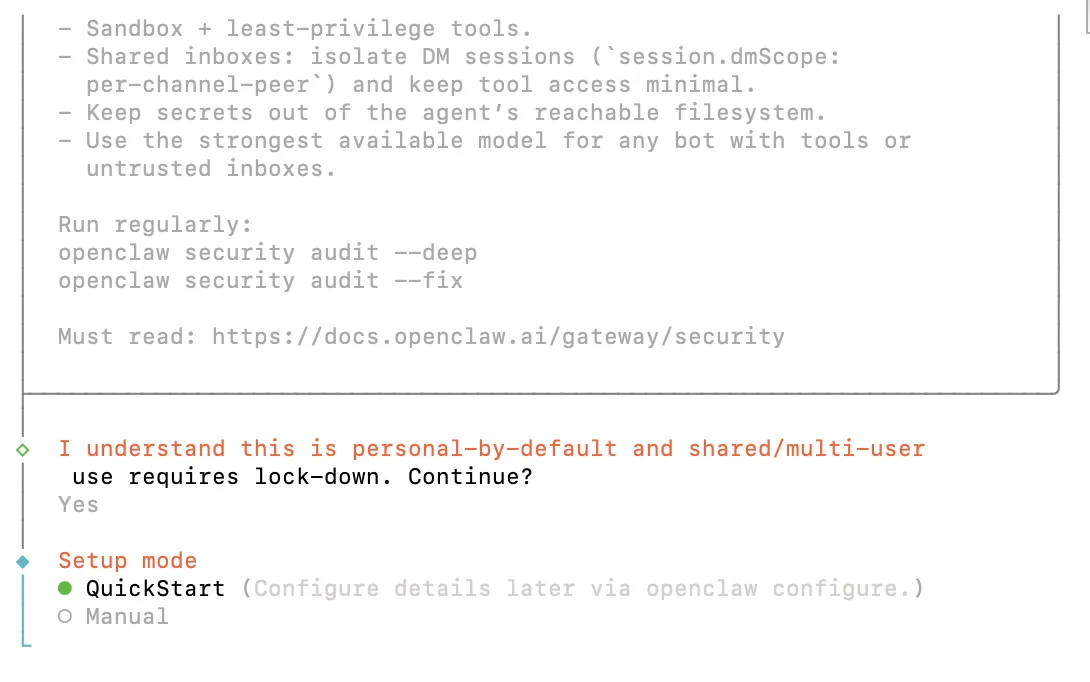
openclaw onboardSelect “Yes”, “QuickStart”.
Select “Custom Provider”.
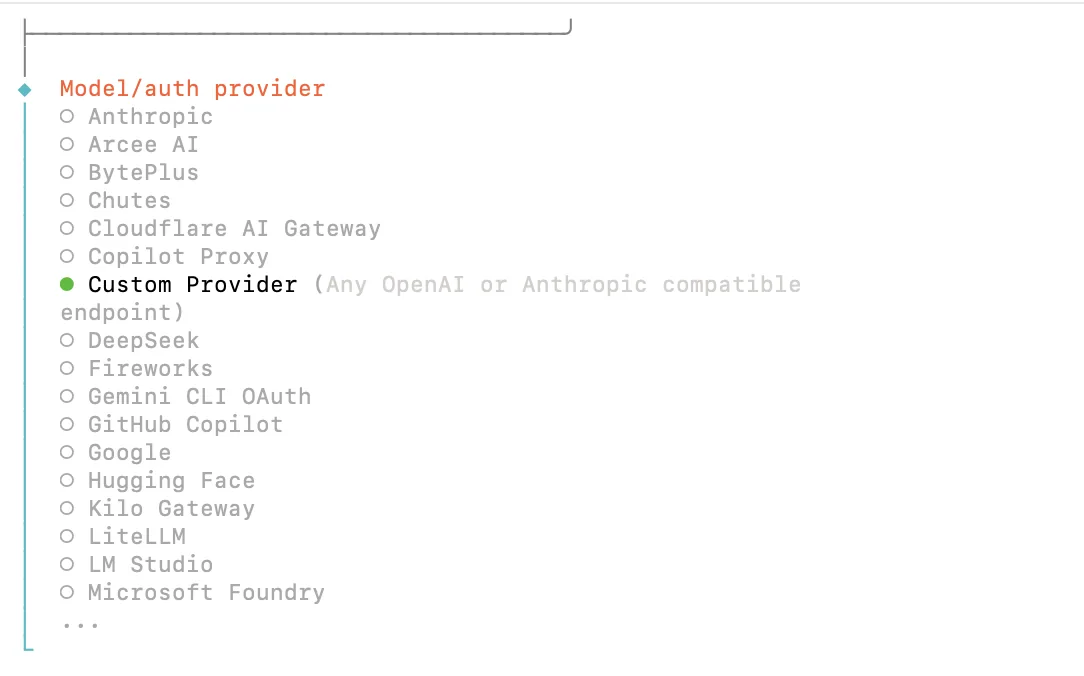
Here are example model configurations compatible with both Anthropic and OpenAI formats.
Claude Opus 4.7
| Field | Content |
|---|---|
| API Base URL | https://router-link.world3.ai/api |
| API Key | Obtain one from RouterLInk |
| Endpoint compatibility | Anthropic-compatible |
| Model ID | claude-opus-4-7 |
GPT-5.3-Codex
| Field | Content |
|---|---|
| API Base URL | https://router-link.world3.ai/api/v1 |
| API Key | Obtain one from RouterLInk |
| Endpoint compatibility | OpenAI-compatible |
| Model ID | gpt-5.5 |
Gemini 3.1 Pro Preview
| Field | Content |
|---|---|
| API Base URL | https://router-link.world3.ai/api/v1 |
| API Key | Obtain one from RouterLInk |
| Endpoint compatibility | OpenAI-compatible |
| Model ID | gemini-3.1-pro-preview |
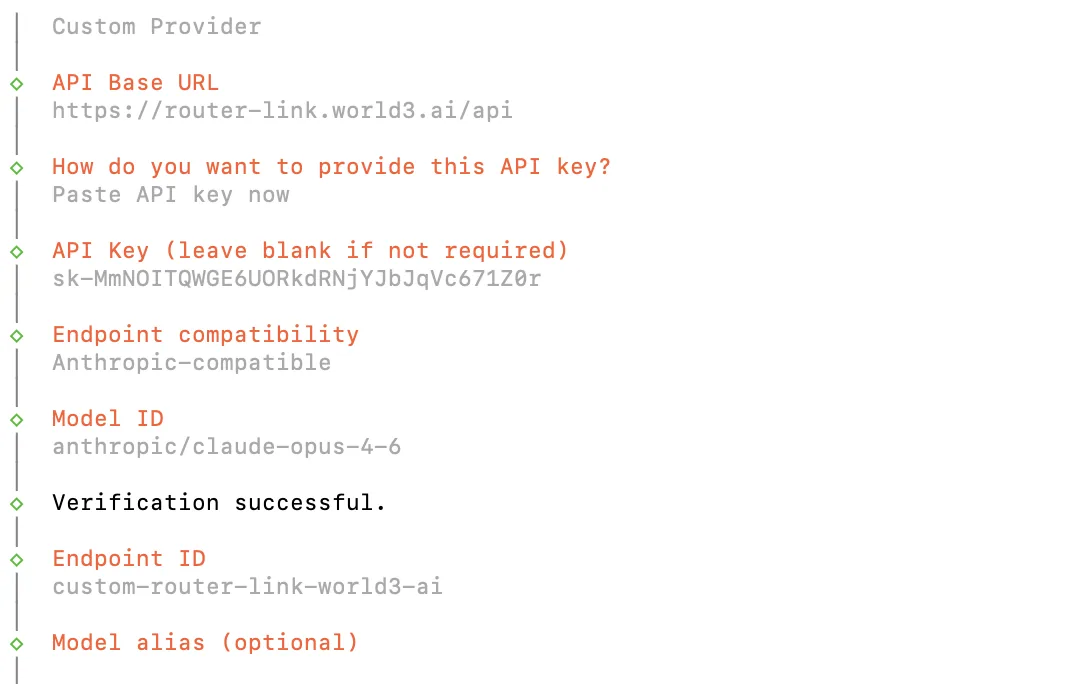
You can add other models based on these:
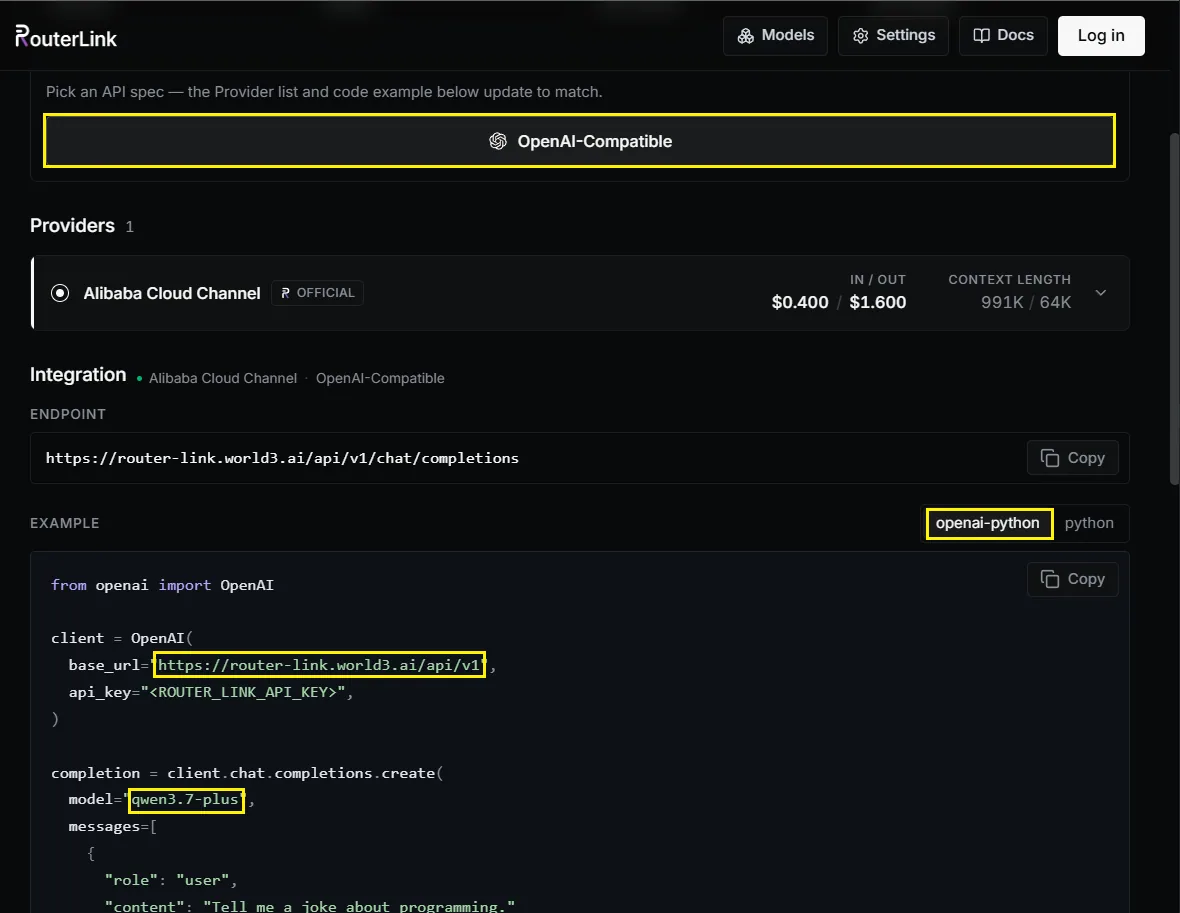
Next, you can configure it as needed.
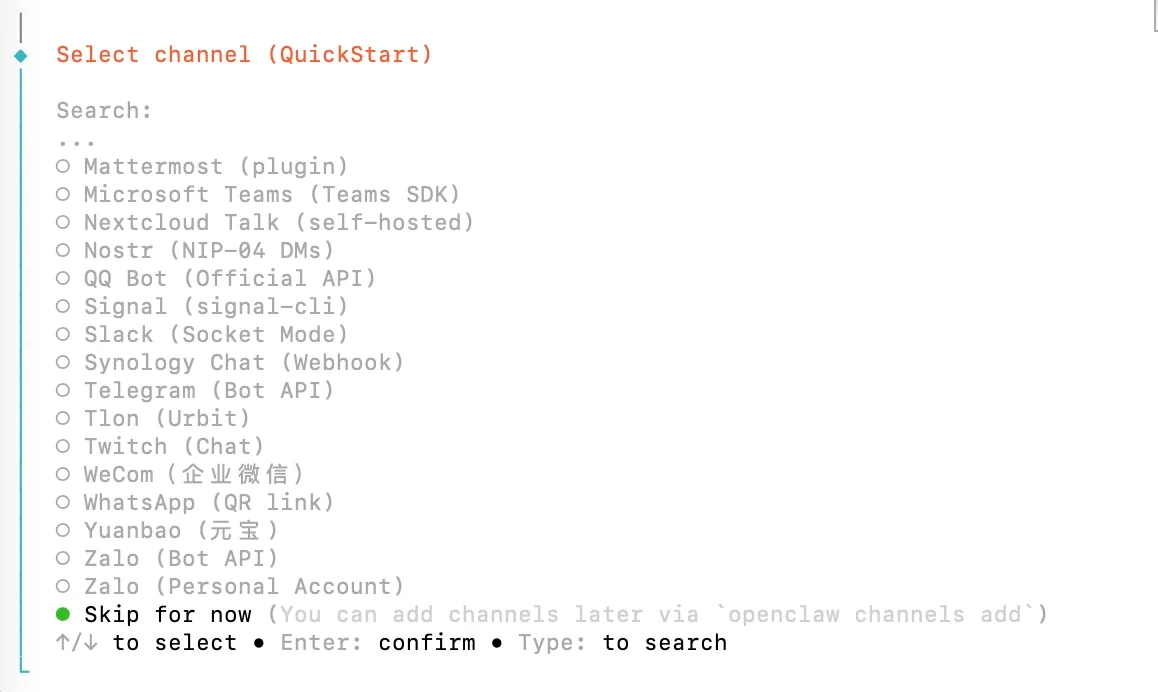
Start using OpenClaw
Run
openclaw gatewayVerify the Gateway is running
openclaw gateway statusYou should see the Gateway listening on port 18789.
Open the dashboard
openclaw dashboardThis opens the Control UI in your browser. If it loads, everything is working.
Send your first message.
Type a message in the Control UI chat and you should get an AI reply.
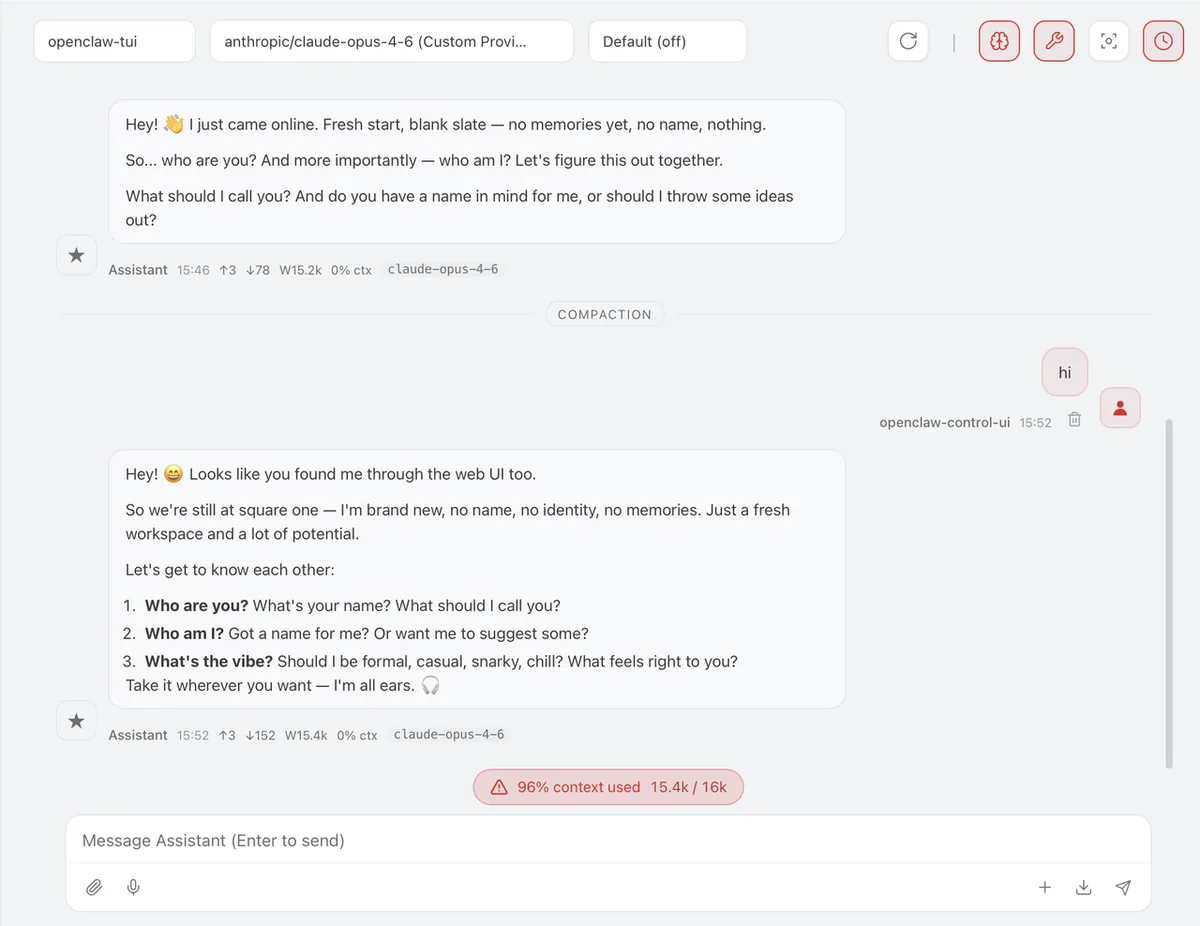
Want to chat from your phone instead? The fastest channel to set up is Telegram (just a bot token). See Channels for all options.
Troubleshooting
Section titled “Troubleshooting”How to add a model
Run it again
openclaw onboardSelect “Use existing values” in Config handling.Add the new model you need under Custom Provider.
The Gateway process is already in use
openclaw gateway stopopenclaw gatewayopenclaw dashboardHow can I upgrade OpenClaw?
Enter the following command in the terminal:
openclaw updateFor more information
Please check the official documentation.